Monthly Archives: October 2016

Prayer to the Green Tara

by Elsa Johnson

green tara image

Small rose     rosette    

rosetta of greening  on grey stone

celadon   jade    acid

green    apple   greening

frost fuzzed    felt adorned    

white furred    greening

Rose Of The Seed World     

little sunflower      seed side

down    green side up

aglow on grey stone.   

Not centered  but  placed 

precisely    inside a circle    

paler than the grey stone

on which it lies

signified thus :

Cornucopia of Seed Heaven

Who prays to you

Rosetta of Mice

and in what language?

Who offered you

Sacred Object of Chipmunks

Prayer Wheel of Squirrels

and in what manner?

Harvest of Birds         

who caws you?    Green Lotus

Celadon    jade    acid 

green     apple    greening    

on grey stone —

Who worships you ?

little sunflower     little rose

little green lotus     seed side

down            green side up

Pollinator Pocket Progress

by Elsa Johnson and Catherine Feldman

Last fall Gardenopolis Cleveland decided to offer to help people develop pollinator pockets, starting with soil building via lasagna mulching in the fall, then returning the following spring to plant pollinator attracting flowers. But, of course, before we began, we had to have a sign…so we designed one.Gardenopolis_PollinatorPocket_final_o

When you see this sign around town, look for a nascent pollinator pocket.

Next, we sent our idea out into the ether and in a short time-voila!-we had a handful of takers.

The original idea had been to place our pollinator pockets on tree lawns or front yards for visibility (else why need a sign?) and make them all the same–a formula–but we quickly ran into a hitch–nature doesn’t do formulas. Each site we looked at was different than the one before.

Since our sites were all different–one long, skinny and very shady, several sunny, one on the edge of the woods–we realized that we needed a variety of plants to meet a variety of conditions. Our goal was that each pocket had plants attractive to pollinators across one complete growing season, i.e., spring to fall. Now we needed to consider plants that could handle a broad spectrum of environmental conditions. Surely a job for (drum roll) native plants!

Our selection included milkweed, aster, coneflower, pink turtlehead, agastache, lobelia, geranium, eupatorium, native solomon’s seal, golden road and salvia. This mix tended toward mid-summer to fall bloomers–we found it interesting how so many of our native wildflowers are late season. We used only plants that were designated as unappetizing to deer.

imagejpeg_0

We usually buy plants in one or two gallon containers but because we needed a variety of plants and needed to keep our costs down we purchased very small plugs from a native plant mail-order nursery.

Checking on our pollinator pockets this fall we found varying results. One that had not been watered was basically gone. But, the rest were growing and doing well–though it will be next year before they mature and fill their purpose.

1005161346-1

If the idea of a pollinator pocket in your garden seems appealing, just let us know. Our goal is a pocket in every garden!


FYI

*A lasagna mulch consists of layers of soil building materials-newspaper, manure, compost, green and dried leaves, straw and wood chips or cover crop-that break down over time to increase the organic composition of the soil.

*A pollinator pocket is an area of at least 5’x5′ planted with a range of plants that help sustain bees, bugs, butterflies and birds throughout the year. Ideally, such pockets would exist in every yard so that the pollinators could travel from one to the next fulfilling their needs.

Hugelkultur: Not as Strange as You Might Think

by Diana Sette

PERMACULTURE IS CONSTANTLY WORKING to model systems after designs in nature, and the practice of hugelkultur is a prime example. Before we get into talking about hugelkultur, I invite you to imagine the forest floor of an old growth forest. Layers of humus, maybe little slopes from tree roots, or moss-covered, decomposing fallen logs, cover the landscape. Herbaceous plants unfurl in the crevices and atop mounds. Self-mulched surfaces produce rich, organic matter from which mushrooms and shrubs spring. Decaying leaves are food for worms, insects, and other arthropods. There is no need for a hose to water, and if it down-pours there, it is unlikely to flood, as the carbon-rich soils have such an extensive water holding capacity. In addition to that, no human needs to fertilize the trees, or the ferns, or the herbs and shrubs producing beautiful berries and nutrient-dense greens. No, this system is self-sustaining and regenerative.

hugelkultur-cross-section

From this springs the inspiration for hugelkultur.   Hugelkultur is a raised bed with an intentionally layered structure with large wooden logs as the base layer. Layers atop the thick fallen-tree-like-foundation include smaller logs, branches, twigs, manure or other high nitrogen organic waste, local soil with indigenous microbes, straw, compost, wood chips, grass clippings, and even food scraps. The idea is essentially to recreate the conditions of a forest floor by building a raised bed with a compost pile that balances the carbon (“browns” like wood and straw) with the nitrogen (“greens” like food scraps, manure, or grass clippings) all put into the raised bed.

Sepp Holzer, a permaculturist from Austria, popularized the hugelkultur practice as a way to build a self-fertilizing garden with minimal irrigation and increased growing space and microclimates. Many people across the planet are beginning to implement this practice in their garden-farms. Why? For lots of good reasons!

First, once you start working with trees and perennials, any gardener can tell you that it’s not hard to accumulate a large pile of cuttings from pruning, or from rotten wood. Therefore, hugelkultur is a practice that supports putting those waste products to good use by recycling their nutrients.

hugelkultur-cross-section-ii

Second, hugelkultur is a great way to build soil. As mentioned above, the layering process,  similar to “lasagna gardening” but with wood and logs included, is like building an instant compost pile in your raised bed. Also, if you’re gardening in an area with compact clay soils or water-logged areas, hugelkultur beds can be the solution to building soil through raised beds.

Third, to reiterate the point above, hugelkultur beds are self-fertilizing because they are built to be like slow-release compost piles that feed the microbial life in the soil, giving access to nutrients and minerals in the earth.

Fourth, hugelkultur beds require minimal irrigation. Woody material has a great capacity to store water—by imitating the forest floor and building a raised bed with dead woody material as the base, you are creating a growing bed that can hold water in its structure. The wood retains moisture and feeds it slowly to plants as needed.

Fifth, the practice of hugelkultur supports the conservation of water and also increases drought-tolerance.

Sixth, like any raised bed, the mound structure of hugelkultur provides a height advantage that is more resilient to floods. In addition to simple mounding, the log layers will work to absorb excess water and spread it upward, while the height will keep many plants growing at a higher level high and dry. 

hugelkultur-diagram

Finally, hugelkultur expands the “edge” and microclimates available to grow in. Think of the ever-popular herb spiral that capitalizes on the variation of height and growing conditions in a contained spiral pattern. The plants at the top enjoy slightly warmer and dryer soils, while the plants toward the base of the spiral enjoy damper and cooler soils. The same scenario plays out for the hugelkultur bed that is more angled.

While many hugelkultur beds are built to be a more rounded, half-circle type shape, others can be taller or triangular to better leverage the potential for diverse growing conditions or microclimates. The extra steepness of the tall triangular shape also allows for the natural settling of decomposition. Some hugelkultur builders have utilized wooden pallets as a base for the sides of the hugelkultur bed to help support the structure of the steepness, while also providing a little more foundation for planting at various heights. People who build hugelkultur beds more tall and steeply also report the benefit of an easier harvest due to less bending and reaching. Clearly, the reasons to build a hugelkultur bed are extensive!

How to build a hugelkultur bed

Materials needed:

• large logs or tree trunks (best if soaked overnight or for a few hours beforehand). The type of wood you use for the beds is important. Softwoods like apple, alder, poplar, dry willow, and birch are generally best—similar choices as you might make for growing mushrooms. Avoid eucalyptus, cedar, or cypress because of their acidity and/or anti-fungal, anti-microbial properties. 

hugelkultur-big-logs

• water • medium-sized trunks & branches

• shovel

• spade

• wheelbarrow

• ground stakes, rope, or spray paint (optional, but helpful)

• small branches (not necessary, but useful)

• recently pruned green material

• organic waste/manure/food scrapes

• local soil

• compost

• straw

• wood chips (optional)

Step 1: Decide on the location of the bed.

Step 2: Use the ground stakes/rope/ spray paint to outline the bed. This step is especially useful, and highly recommended when working with a larger group, so that everyone understands and can easily visualize the plan.

Step 3: Use spades and shovels to edge the outline, and then dig a 3-4” trench. Important: save the soil for later.

Step 4: Place the large logs as the bottom layer of the trench. This will help to improve drainage and retain humidity of the bed soil. It is preferable that the logs are pre-soaked prior to using, as this will significantly help the soil and microbes get off to a good start in maintaining moisture for the bed. If logs are not pre-soaked, another option is to run the hose during the process of layering the bed as to wet all materials.

Step 5: Place smaller tree trunks and branches on top of the bigger ones. 

hugelkultur-smaller-branches

Step 6: Place organic waste, or recently pruned green material on top of that. This nitrogen layers will balance the slow-to-break-down high-carbon layers of wood.

Step 7: Place the soil from Step 3 on top of the pile. This will seed indigenous microbes into the bed.

hugelkultur-soil-and-compost

Step 8: Cover with compost to give soil health a jumpstart. 

Step 9: Top off with either straw or wood chips, and plant within the top layer of the bed. Plants that need less water should be planted towards the top of the mound, and those that need a larger amount of water should be planted near the bottom.

Many hugelkultur gardeners recommend waiting a full moon cycle before planting the bed to allow for settling and integration of the layers. The devil’s in the details… A few notes to consider when building a hugelkultur bed: Have all materials prepared and ready on-site before starting. Building a hugelkultur bed can be hard work with the lugging of large logs and piles of soil and wood chips. It’s always a good idea to get a group together to help. Maybe offer it as a free skill-share event about hugelkultur beds, or be ready to offer the nutrient-dense food that will be growing soon. However you do it—remember, many hands make light work! Save annual prunings for hugelkultur layering materials. If you want an added bonus of mycelium, when soaking wood materials in water, you can use mycelium powders mixed into the water as an inoculant to jumpstart the soil food web for the new raised bed. For the top of the hugelkultur mound, select plants that need less water like garlic, and for the bottom, chose plants that enjoy more water like beans. 

hugelkultur-plantings


If one does want to use irrigation for the hugelkultur bed (e.g., in drylands or during extreme drought), there are a couple options to consider. One option is to shape the hugelkultur bed in a more tiered fashion, allowing for lines of drip irrigation to be laid down and staked along the top ridge, then along two tiered levels on the sides of the bed, and two more along each side at the base. Using drip irrigation is the most water-saving approach.

However, another option for irrigation that is perhaps more efficient in utilizing the benefits of how the moisture flows through the hugelkultur bed, is implementing irrigation channels. This method of irrigation is particularly useful if your growing area is prone to flooding. Have fun and happy hugelkultur!

hugelkultur-planting-iii hugelkultur-planting-v hugelkultur-planting-iv

Diana Sette is a passionate community cultivator, gardener, writer, facilitator, and mother. She is a Certified Permaculture Teacher and Designer, and is the Co-Founder of Possibilitarian Garden (Facebook: Possibilitarian Garden) and Possibilitarian Regenerative Community Homestead aka PORCH (www. buckeyeporch.org) in Cleveland, OH. Diana serves on the board of The Hummingbird Project (hummingbirdproject.org), and Green Triangle (greentriangle.org). She is a frequent contributor to Gardenopolis Cleveland. More on Diana at dianasette.wordpress.com.

The Peripatetic Gardener Visits Naumkeag

by Lois Rose

By chance, because of my son’s wedding, I was able to visit a unique and memorable garden near Stockbridge, Massachusetts recently. We had part of day “off” from wedding festivities and decided to see this estate which includes a “cottage” designed by Stanford White and built for Joseph Hodges Choate, a well-known attorney, between 1886 and 1887 on the top of a hill overlooking fields and mountains.

The 44-room mansion called to my husband and cousin but for me and my other cousin it was the gardens.  Mabel Choate, the daughter of Joseph, worked with Fletcher Steele for over 30 years to produce them.  They are a “collection” of garden rooms, eclectic and entertaining, spanning most of the space around the house on the hill top.  Unfortunately they had fallen into disrepair over the years.  The Trustees of Naumkeag took over the restoration of the gardens and there is a tremendous amount of new planting and replanting going on. 

The Blue Steps are the most well-known aspect of the rooms, extending from an area near the house down to the lowest part of the gardens.  If you have ever glanced through a book about structures in gardens, then this picture will be familiar. 

The Tree Peony Garden has been completely redone and the peonies are not looking their best after a serious drought this past summer.  Built into the side of the hill on terraces, it must have baked in the heat.  The Chinese Garden is quaint with mostly hardscape at this point.  The Evergreen Garden is impressive and elegant. The Afternoon Garden is against the side of the house and has a great view down to the fields below the house. 

Water features, stonework, paths—all restored or in the process.  New plantings have restored privacy and recreated vistas throughout the gardens.  There is an unexpected grove of pines and older trees five minutes from the house: suddenly you are in the woods, away from anything planned or ordered. 

The house delighted my companions, but I think my cousin Dan and I got the better part of the tour.

Eating Local: Butternut Squash

by Jonathan Hull

“Eating local,” the goal of all of us who want to save the planet, presents special hurdles for residents of temperate climates such as NE Ohio:  Our short growing seasons limit access to local fresh produce for way too long.

Yet there is at least one standard garden crop that can provide staple eating throughout the year—even up until (and even past!) the next harvest.  I write of the humble butternut squash.

squash-from-last-year-ready-for-pumpkin-pie

Raised and stored correctly, butternut squash can, with minimal special equipment or processing, provide year-round good eating.  And let me emphasize the word “good.”  At the end of this article, I’ll offer three recipes of which my family never seems to tire.

Squash to the Rescue

In my experience, squash is by far the easiest crop from the garden to store.  Under proper conditions that I will outline below, it can easily keep for two years and potentially even more.  I’ve eaten squash that was more than two years old that still tasted great.  Once we settled on a specific variety—butternut—it became the highest yielding and most consistent crop from our garden from year to year.  Grown in one raised bed 30 inches wide and only 32 feet long we have had harvests of between 150-175 pounds of squash!  This averages out to about three pounds of squash every week for a year. 

Site Selection:

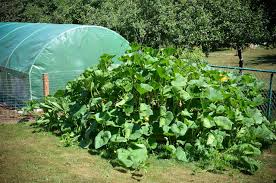
The challenge to growing squash in a small garden plot is that these vigorous growers take up a lot of space.  From the dimensions described above, our squash vines grew to take up more than five times the space of the bed they grew in. 

squash-over-grass

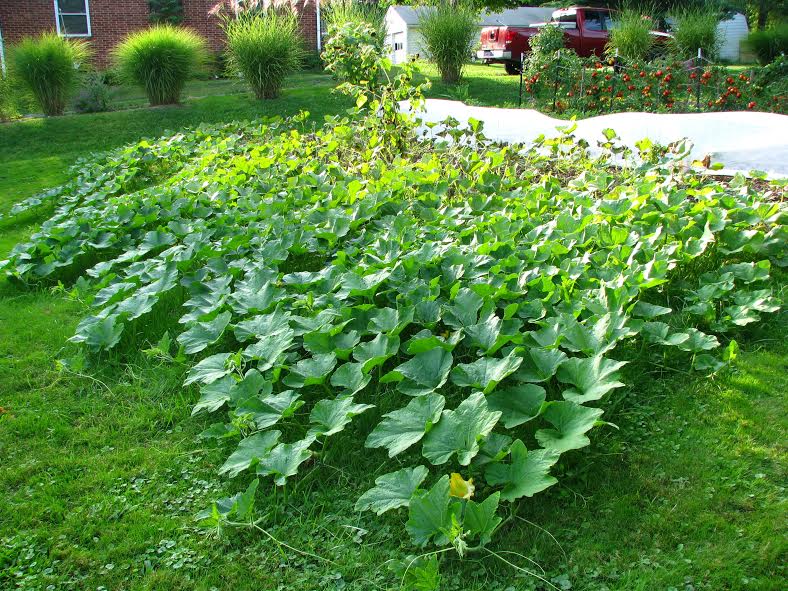
Squash originally evolved in a partnership with mastodons and mammoths (a fascinating story for another time) and seem to have adopted the brash nature of their former partners.  They go wherever they please in the garden and will happily overwhelm smaller plants.  With proper placement, however, small plots can take advantage of squash’s exuberance without sacrificing a lot of space.   

This placement involves planting squash at the edge of the garden.  If your garden is contained within a trellis, fence, or a wall, then this might be a great place to grow squash vertically.  If your garden is in a clearing of trees then squash can be allowed to grow in the border between the garden and the trees. The main consideration for growing squash in any placement is that it requires full sun.

In our case, we grow squash at the edge of the garden and the lawn and then train the vines to grow out over the grass.  Since we already use a lawn mower for other parts of the yard, the space the vines will eventually grow into can be easily maintained.  As the vines grow out onto the lawn, I set the mower to cut the grass very short for a pass or two in front of the vines.  The vines can then effectively shade out the grass below them, and more or less keep the grass from growing high. 

This way I can grow the squash in a small bed and only sacrifice a bit of lawn – of which we have plenty.
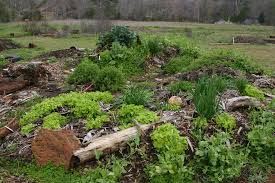
Soil Preparation:

If you are growing squash for storage, then you will be planting it in the summer.  Be sure to keep its growing bed covered throughout the spring. This might be with a short rotation spring vegetable, a deep layer of mulch or a cover crop.  Squash are heavy feeders and will happily grow in soil amended with heavy applications of compost.  If I’ve got enough compost on hand I try to give the squash bed a double helping of compost spread to 4” deep.  As in the rest of the garden, I amend the soil with various minerals as indicated through yearly soil tests.  I also amend the garden every spring with recommended applications of broad spectrum mineral rock dusts such as Greensand and Carbonatite.  Some growing guides recommend planting squash in ‘hills’, but since I use raised beds I don’t bother since the entire bed is a ‘hill’.

Selecting the best squash variety:

There is a dazzling diversity of squash varieties that grow fruits of various sizes, shapes and colors.  Some will store longer than others.  Some are more resistant to pests and diseases and some will have higher yields.  Some may have better flavor or be better suited to certain dishes.  As with other crops in the garden, feel free to experiment with different varieties.  However, I have also found that there comes a time when you have to settle on a variety that works well for your circumstances year in and year out .

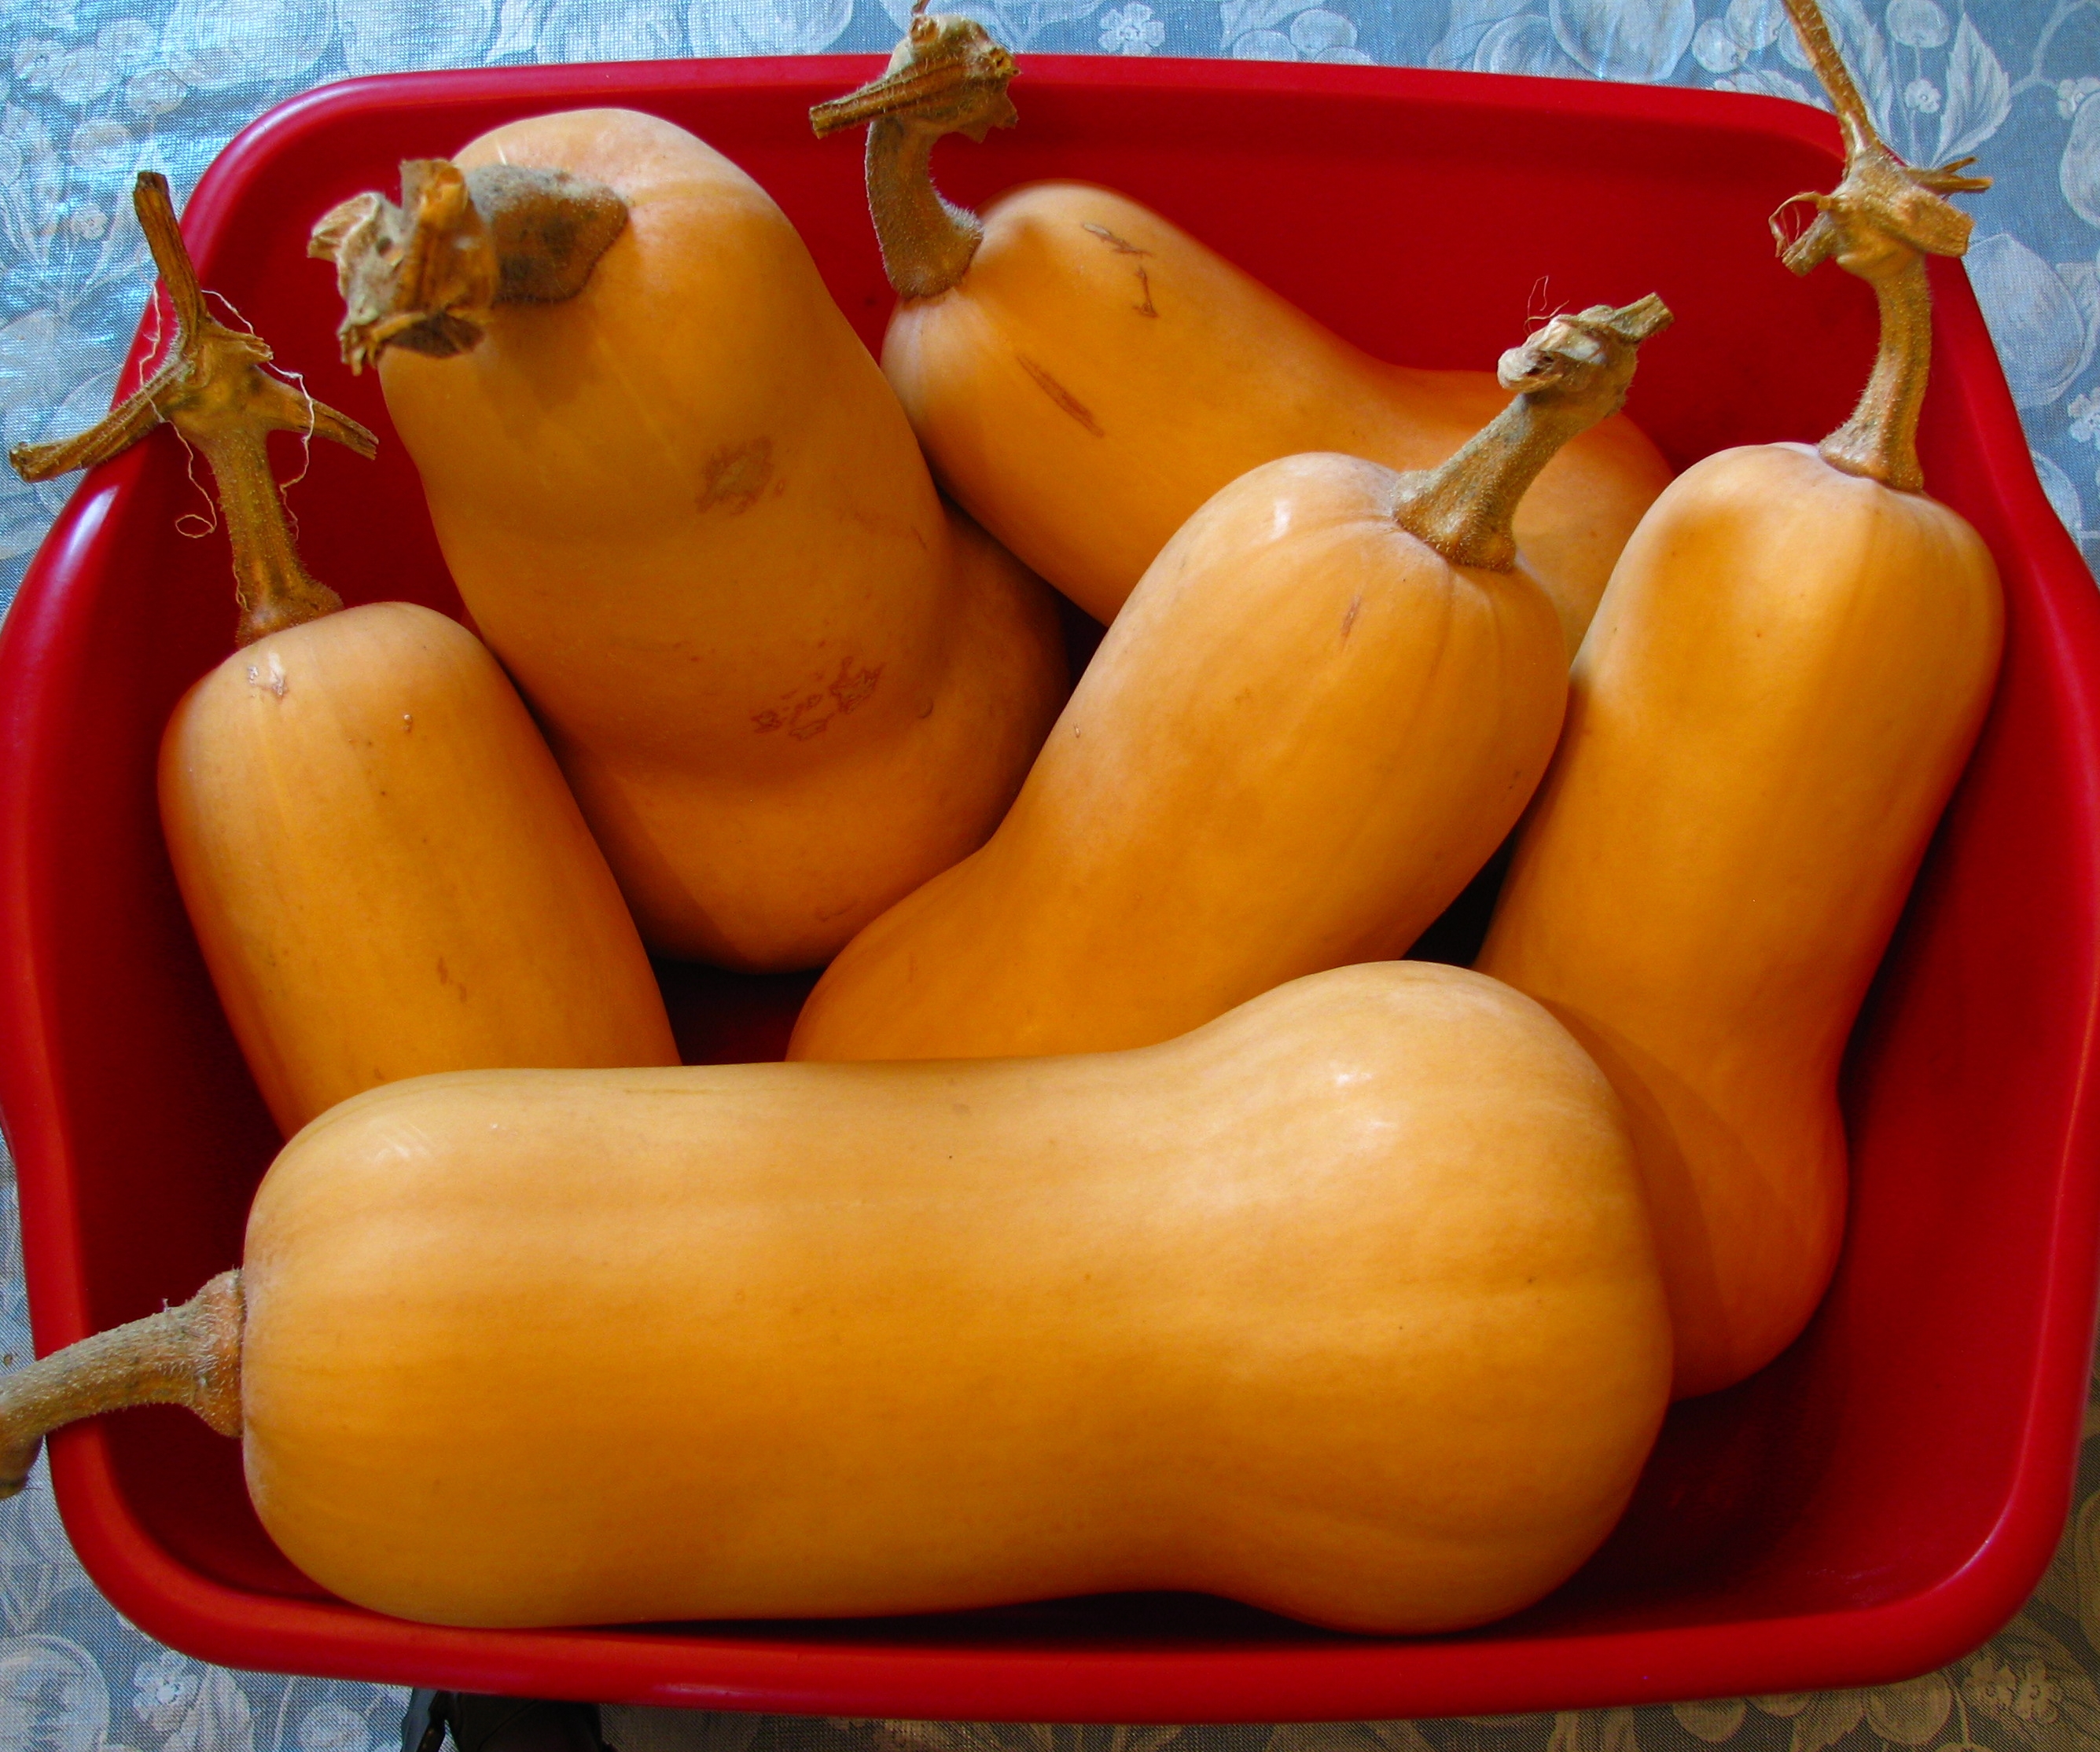
So for instance, I love the taste of the deep orange flesh of Hubbard squash varieties.  However, I tried to grow this type for several years and never got a harvest.  Insects called squash vine borers destroyed the vines.  This led me to the butternut varieties which grow on thinner woodier stems that the vine borers avoid.  Specifically, ‘Waltham’ butternut is the gold standard for storage squash in our garden.  It is resistant to diseases such as powdery mildew and gives consistently large yields.  It has a great flavor and is amendable to various dishes.  It has a small seed cavity and comes in sizes that are suitable for cooking small dishes.   When properly harvested, cured, and stored, the harvest from the year before will easily carry us through to when the next crop is ready to eat. 

Planting:

Deciding on the best planting date is a balance between two considerations.  First, squash love hot weather and grow best in soil temperatures at 90 degrees F.  It’s best to wait until things really warm up in the summer to plant the seeds out.  However, you don’t want to wait too long because you want to give the squash time to fully mature their fruit before the first frost sets in.  Fully mature fruit is important for long-term storage.  With that said, I’ve found it better to err on the side of a later planting date.  Cool soil slows down their growth and even seems to stunt them for a time, so that any extra growing time is lost by getting them in too early.  We are in Zone 6 and shoot for a planting date around June 15th.

Warming Aids:

Since the weather doesn’t always give us what we hope for, we like to give extra insurance that our plants have the warm soil they like.  In the past we used black plastic mulch to help warm the soil.  It works well, but comes with downsides.  It is hard to use with our soil building techniques such as in-season crop rotations, deep mulching and cover cropping.  It always seems to be down when it’s needed up and up when it’s needed down.  If you don’t have drip line irrigation, watering seems inconsistent as the water only has a small hole through which to reach the soil.

So this year I switched to using row covers and will never look back.  These are spun polyester “sheets” sold under the brands Agri-Bond and Remay.  We hang this ‘cloth’ over the bed with wire hoops. 

young-plants-under-row-cover

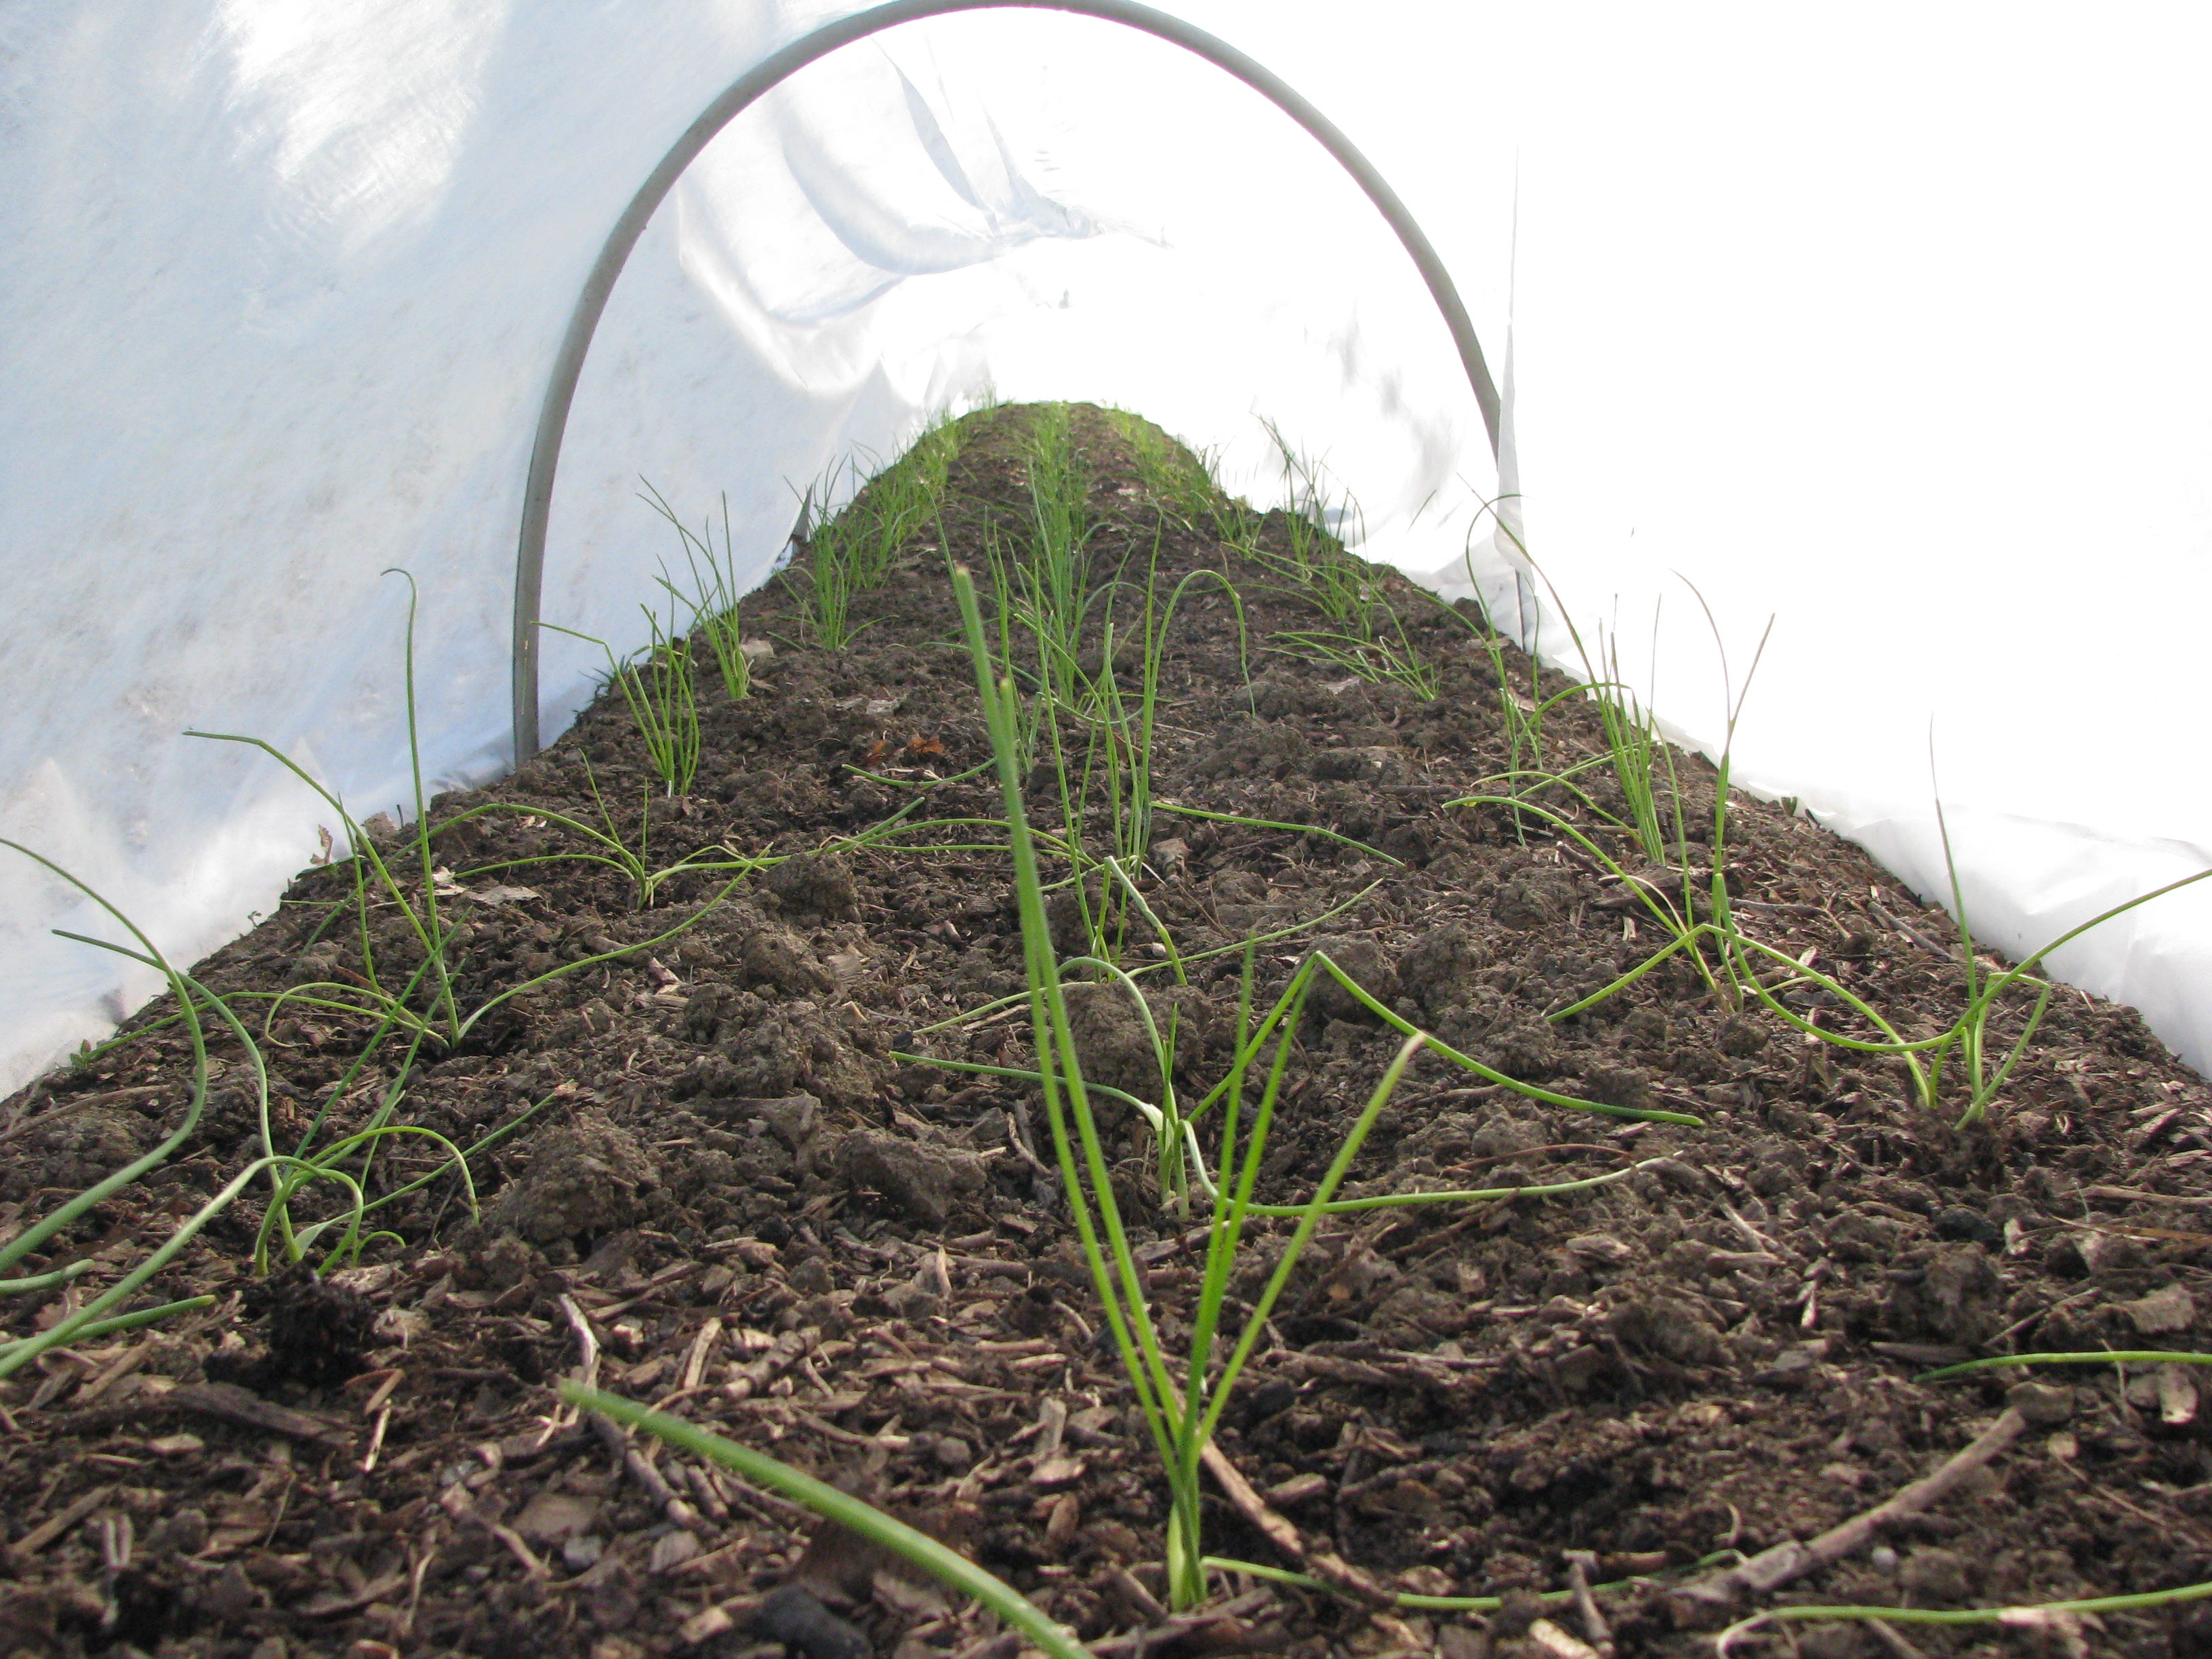
They hold in just enough extra heat that all plants seem to love, but as opposed to plastic sheeting, they rarely need to be vented.  They also let rain through, but keep existing soil moisture in.

About a week before I plan to plant our squash seeds, I will pull back any mulch from the soil surface to let the sun warm and dry it out a bit.  I will also go ahead and put the row cover over the bed to get it warming even faster.  After the seeds go into the ground, I will leave the row cover over the bed for a few weeks until the vines begin flowering.  This is very important!  Squash are pollinated by insects so you have to remove the row covers if you want any fruit.  By that time they have leaped out of the gate and will be growing out of the bed space.     

Growing:

It is easy to forget about squash as it is growing because it requires so little attention.  So don’t forget to provide consistent water throughout the growing year.  I keep an eye on the forecast and try to water before any real scorching hot summer days.  This seems to help with heat stress for those days over 92 degrees.  You will also need to train the vines in the direction you want them go grow.  Do this early as it is easy to damage larger vines when trying to move them.  Since squash are such heavy feeders I try to give them a foliar feeding every week if I can – with special attention to when they are in flower or are setting fruit.  I typically use a combination of fish hydrolysate and liquid seaweed sprayed onto the leaves at the recommended application rate.

Harvest:

For the best storage you want to wait to harvest squash until they pass the “fingernail test”.  When it’s difficult to press your fingernail into the rind of the squash, it’s ready for storage. You should have difficulty even making a mark.  However, in practice I just let all the squash stay in the field until the weather calls for the first frost.  A light frost will not ruin your crop but it will shorten its shelf life.  So to keep things simple I go ahead and harvest the whole crop the day before the weather calls for a frost. 

Cut the squash from the vine, but leave a few inches of the stem attached to the fruit.  Do not pick up squash by the stem or it may break off.  Squash without a stem will not store for long.  Be gentle when handling them, as well.  Bruises or gashes in the rind will also shorten their shelf life.  Brush off any dirt, but do not wash the fruit to a squeaky clean.  The microbes that are naturally on the fruit help to protect it from spoilage.      

I put the fruit on racks in a single layer until I am ready to cure them.

Curing:

Before putting the squash away for storage, it is best to cure them in the sun for 7-10 days.  This hardens their rind and extends their shelf life.  Cover the squash at night or put them in a protected area if it is going to frost. 

Storage:

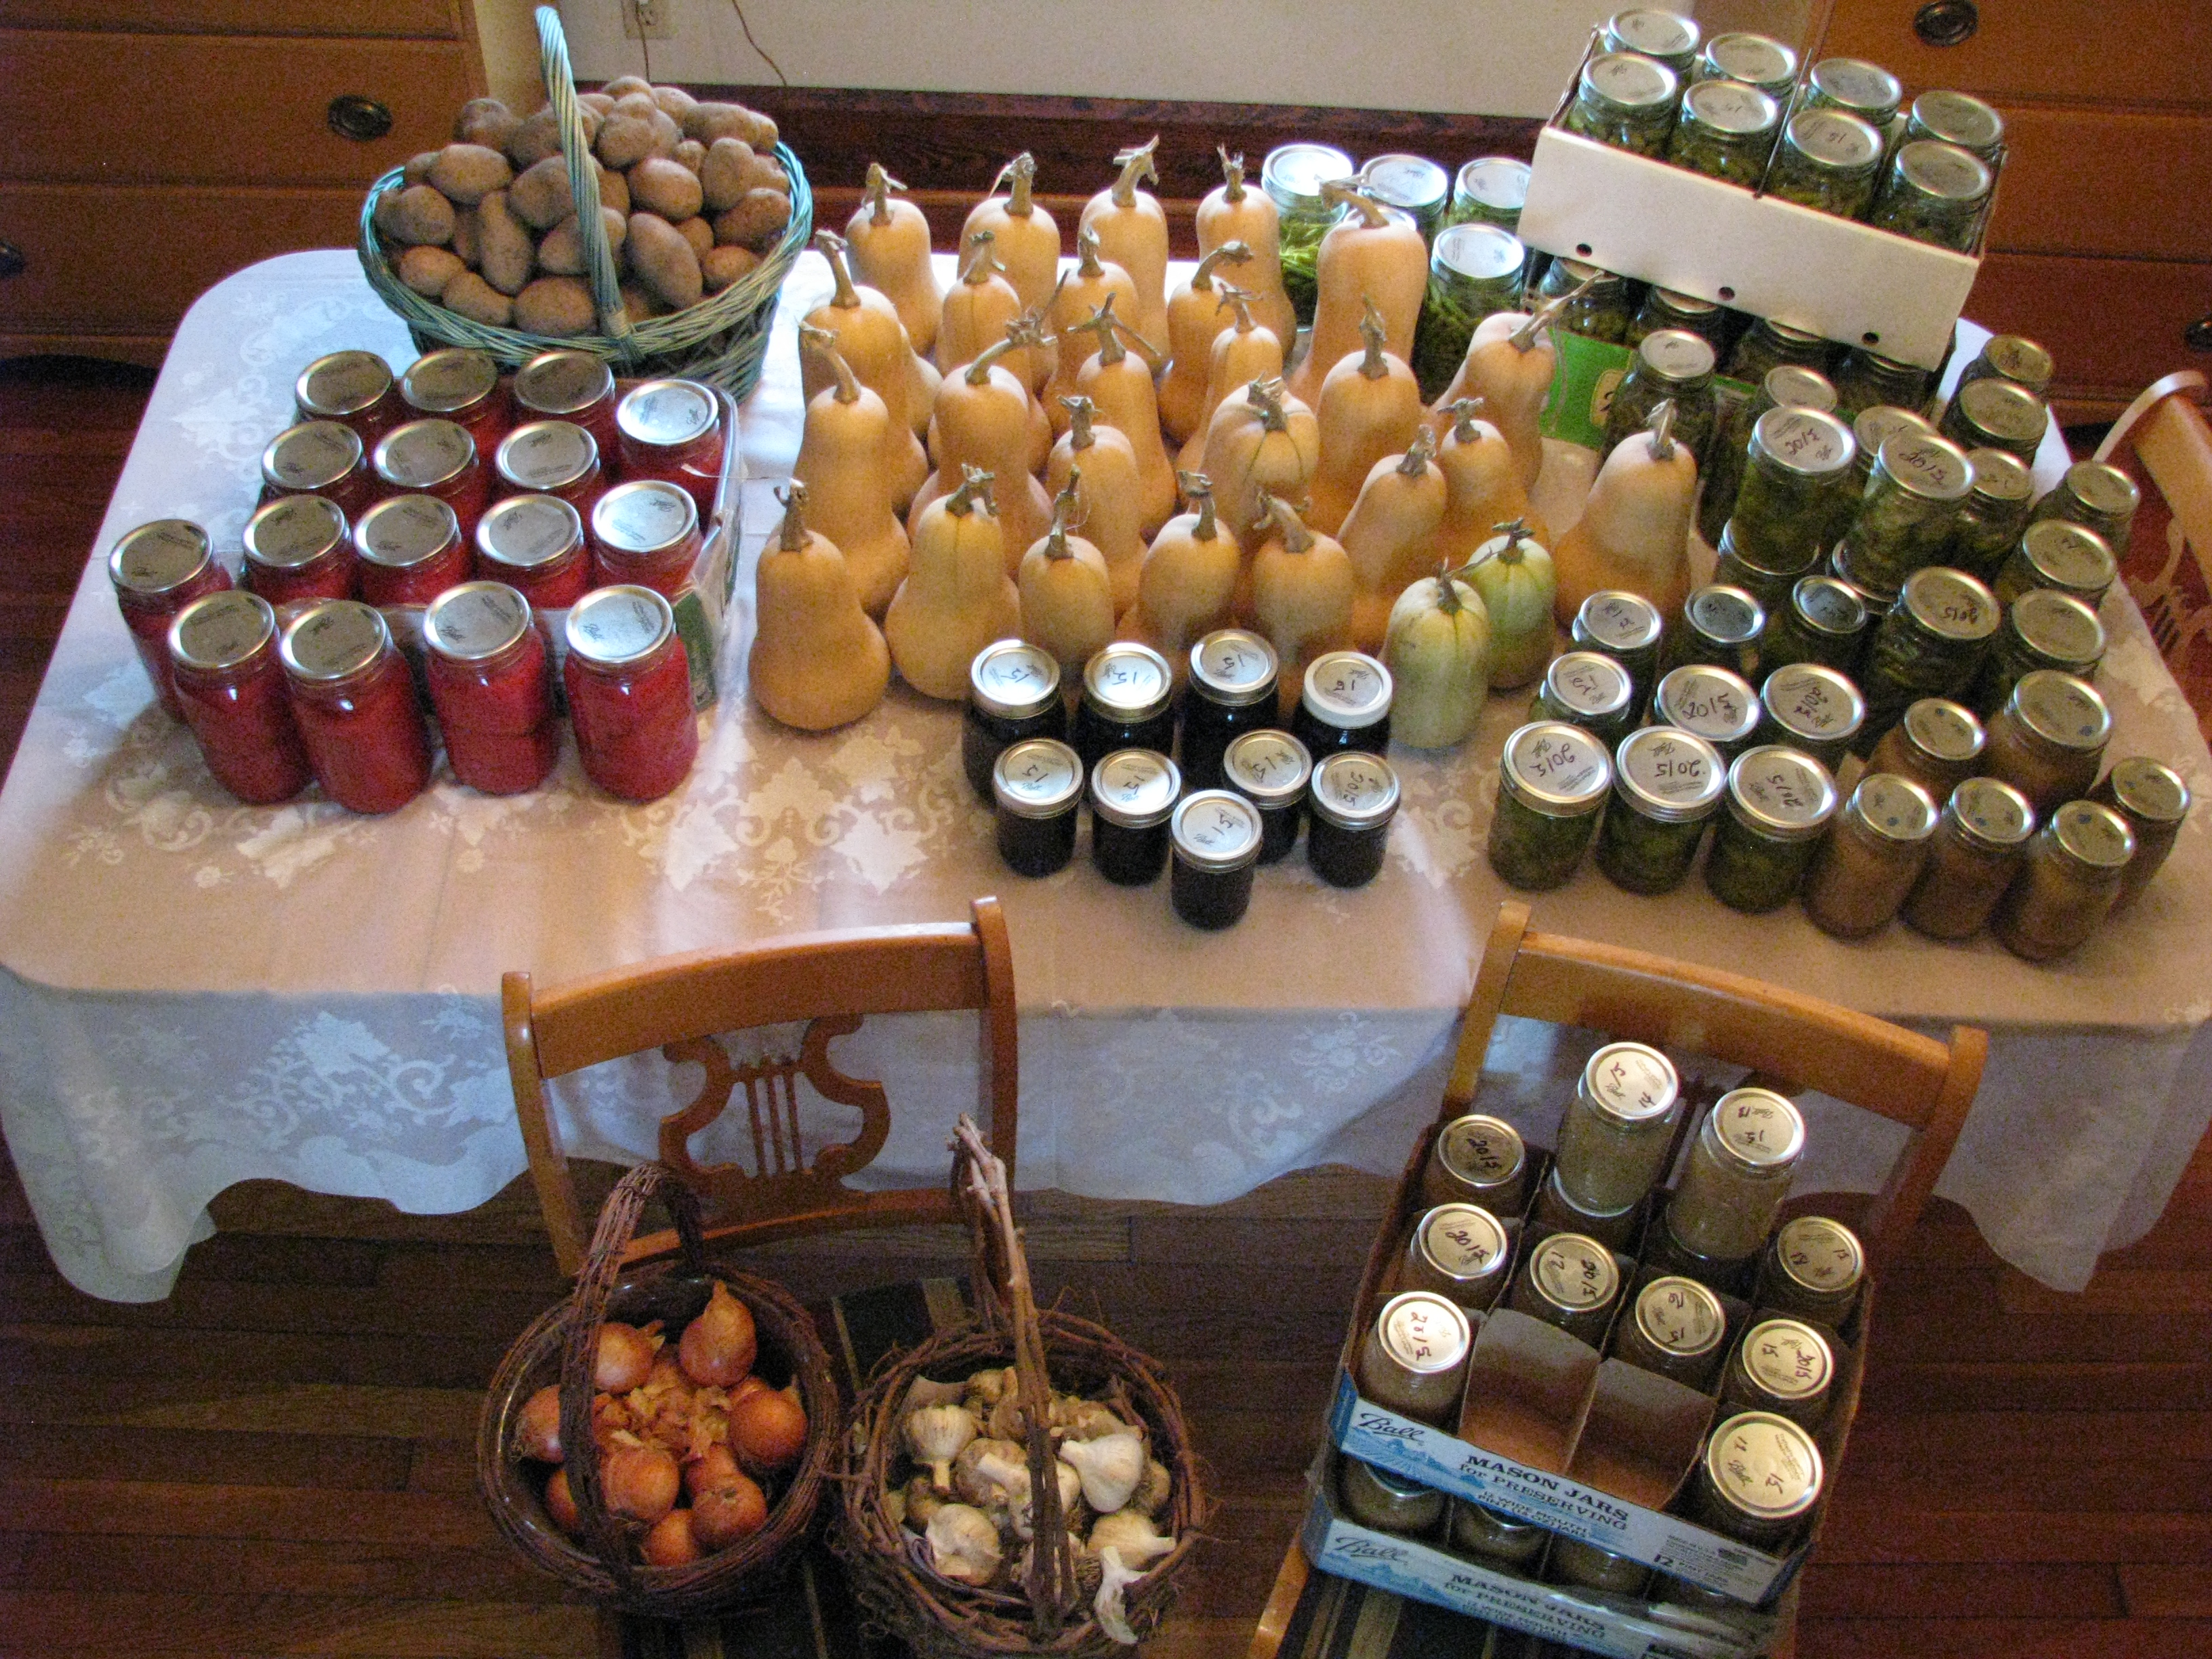
Before I store the squash I organize them.  Unblemished fruit with hard rinds I put in one pile that will serve as the long keepers.  Any squash with blemishes or young fruit that might not have had time to fully mature on the vine I put in another pile (use the fingernail test).  These we will eat first.

I put the squash in a single layer on bread racks and try to keep them from touching each other.  Allowing air to flow all around the squash is key to long-term storage.  Ideal conditions are temperatures at 50° F and 60% humidity.  In practice any unheated space that doesn’t freeze in the winter and is moderately dry will do.  We stack our racks on a shelf in an unheated basement. 

Once you get the practice down it doesn’t take much to have squash on hand all year.  Periodically check your entire store and pick out and eat any squash that are starting to mold.  If storage conditions are not ideal and your stock begins to turn by the following summer you can always cut out the bad parts and cook the rest up a big batch.  Freeze it and you can cook with it again later.

harvest-table

Cooking:   

The taste of many squash varieties, including butternut, actually improves with storage.  We keep a handful of squash from the previous year to cook with in November when all things pumpkin are called for.  Butternut squash makes amazing pumpkin pie!

Here are a few recipes we love.  Some are easy to make and are great “go-to” side dishes.  It might seem dreary to eat a lot of the same food throughout the year, but we’ve found that food grown in your own garden in nutrient rich soil tastes so good it’s a pleasure to eat it at any time.   Feel free to explore on your own: there are endless uses for butternut squash.  You can use it in place of pumpkin or any other winter squash for that matter.        

Curried Squash Soup:

curried-squash-soup

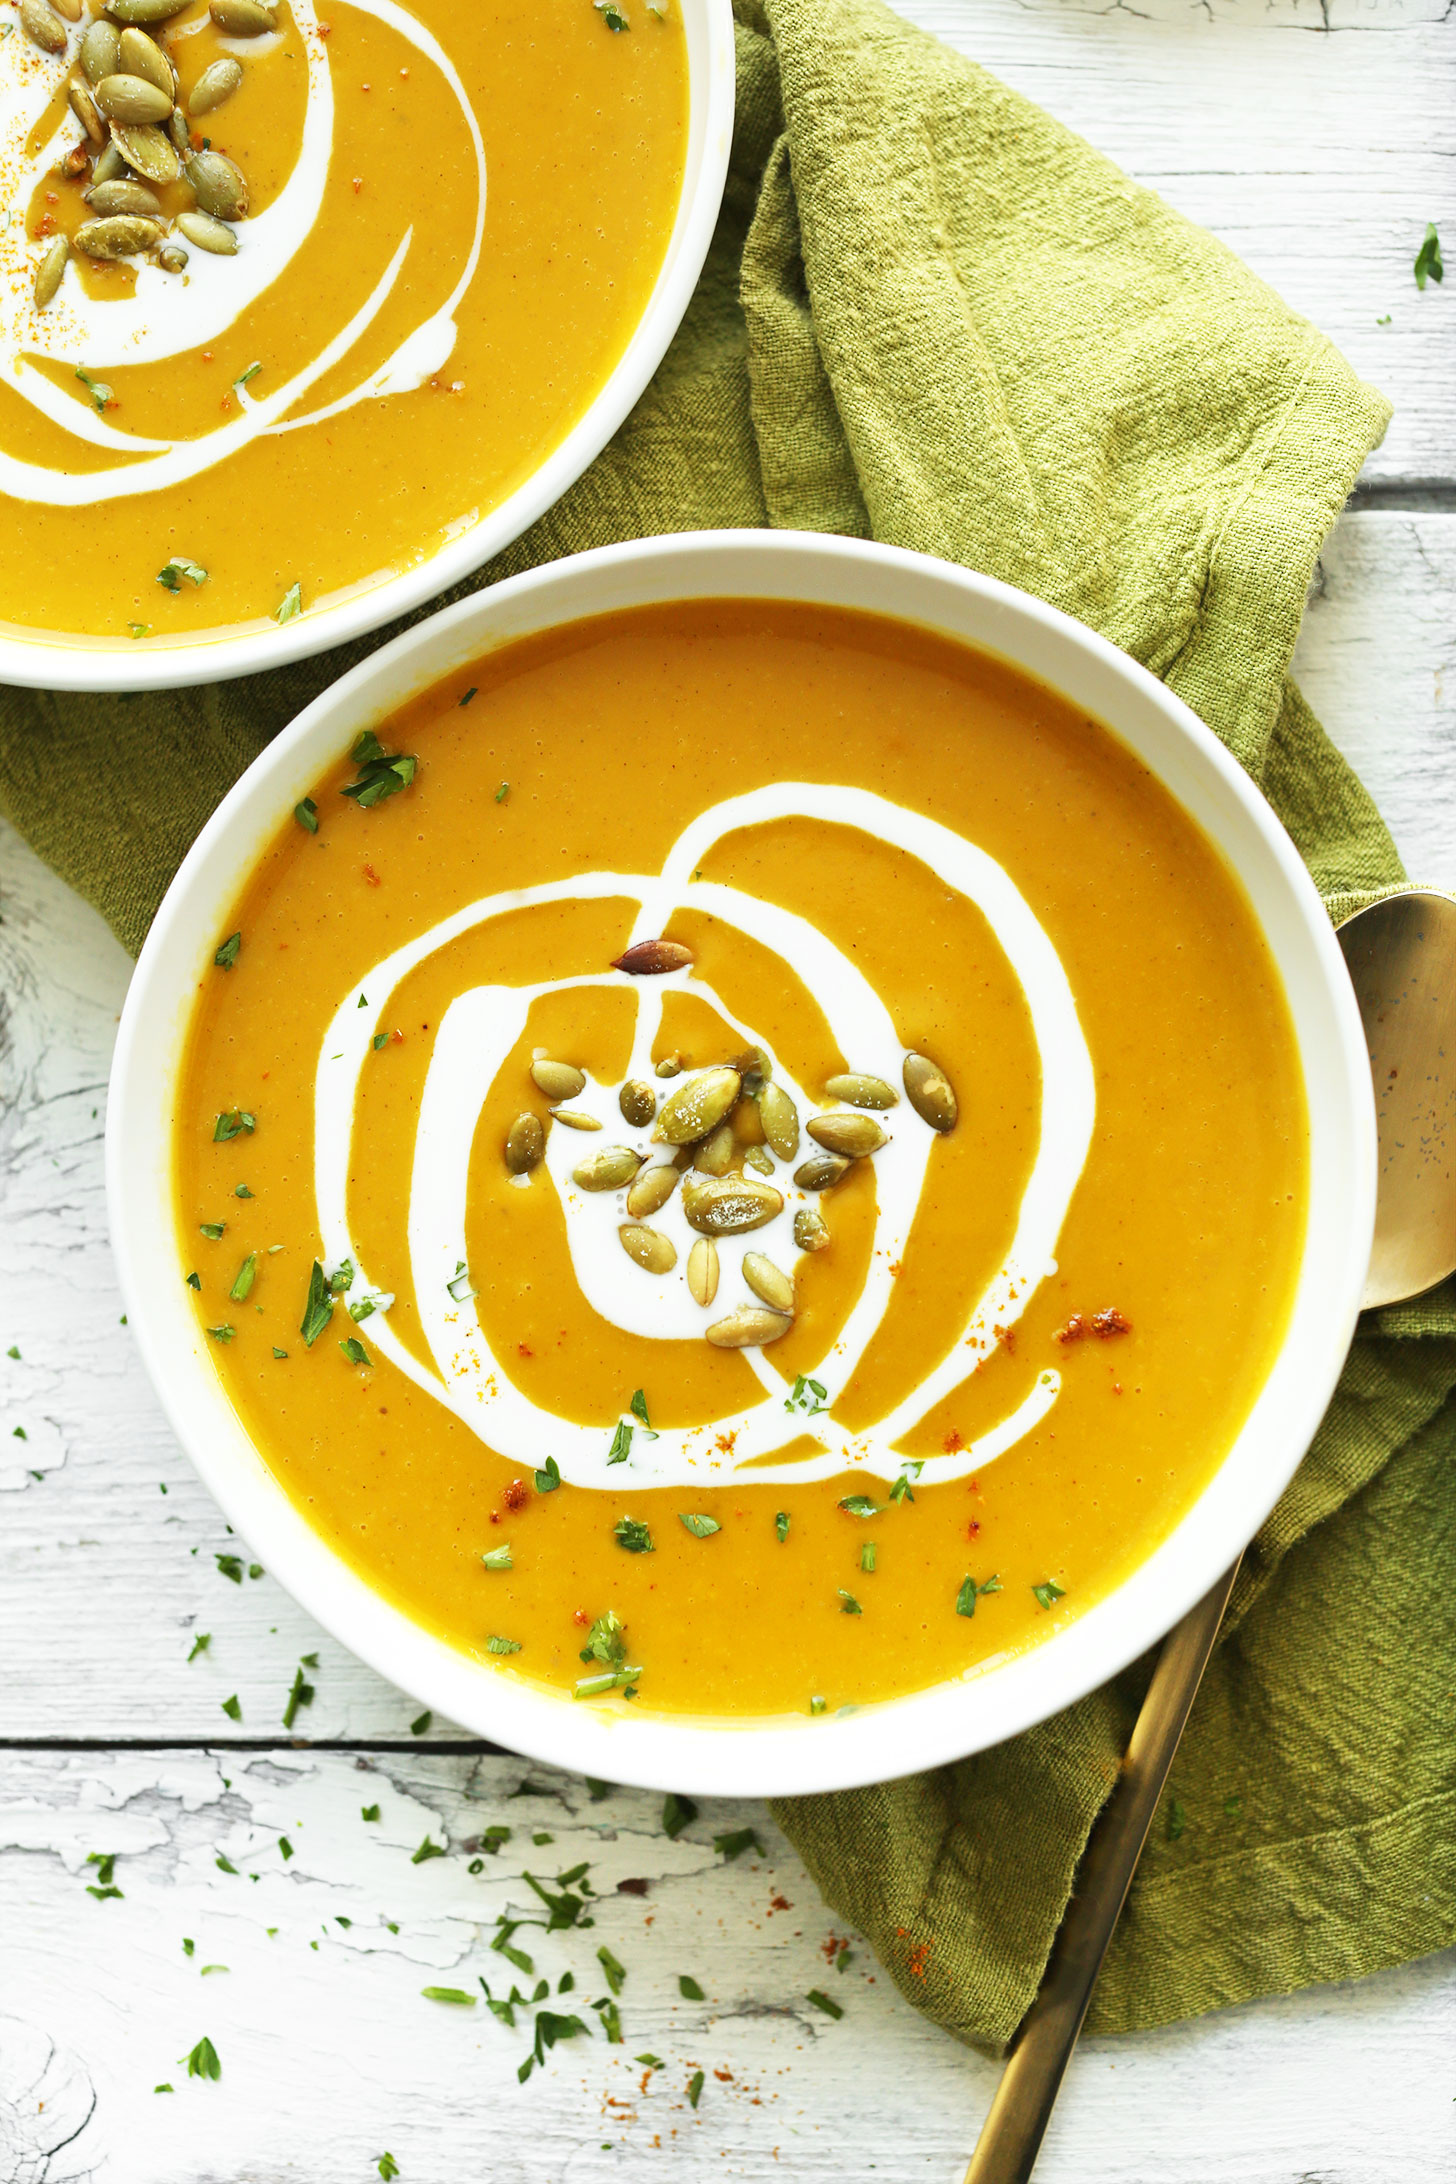
Nothing warms you more on a cold fall night than a bowl of this soup!

Prep time: 5 minutes

Cook time: 25 minutes

Serves 4

2 tablespoons butter

1 medium onion, chopped

1 large carrot peeled and chopped

2 cloves garlic, minced

2 teaspoons fresh ginger, minced

1.5 teaspoons curry powder

1 can (14 oz) chicken or vegetable broth

2 pounds butternut squash

1 can (14 oz) coconut milk

1 teaspoon salt

roasted sunflower seeds (garnish)

Butternut squash seem to average about two pounds per fruit, which is perfect for this recipe.  Cut the squash in half lengthwise and remove the seeds.  Preheat oven to 325 degrees.  Place the squash face down on a baking pan, then put them in the oven.  Add a thin layer of water to the bottom of baking pan to steam cook the squash.  Cook for an hour or until the flesh is very soft.  Let the squash cool and then scoop the flesh out of the skin with a spoon.

In a large saucepan, melt butter over medium heat.  Add onion, carrot, garlic, ginger and curry powder.  Cook until carrots are almost soft, 5-8 minutes, stirring occasionally.

Add broth and bring to boil over high heat.  Reduce heat to medium-low; cover and simmer until carrots are very soft, 10 minutes.


Transfer to blender or food processor and puree until very smooth.  Return to pan and stir in squash, coconut milk and salt.  Cook over medium-low heat until heated through, 2-3 minutes.

Garnish with pumpkin seeds, roasted sunflower seeds or cashew nuts if desired. 

Butternut, Potato and Apple Mash

butternut-and-apple-mash

This is our go-to side dish for many a meal.  The combination of flavors makes for something you can eat all the time.  A side bonus is that we also grow a lot of potatoes for storage.  It goes great with cider glazed chicken sausages.

Prep time: 10 minutes

Cook time: 40 minutes

Serves 4

1 small butternut squash (1 pound) peeled and cut into 1-inch pieces

1 large potato (10 oz) peeled and cut into 1-inch pieces

1 Granny Smith apple, peeled and cut into 1-inch pieces

1/3 cup of 2% Greek Yogurt

In a medium saucepan combine squash, potato, and apple.  Cover by 2 inches water and bring to a rapid simmer over medium-high heat.  Cook until squash and potato are tender when pierced with a knife, 15 minutes. 

Drain vegetables and apple and transfer to a food processor.  Process until smooth.  Add yogurt, season with salt and pepper, and pulse to combine. 

Squash Custard

butternut-squash-custard

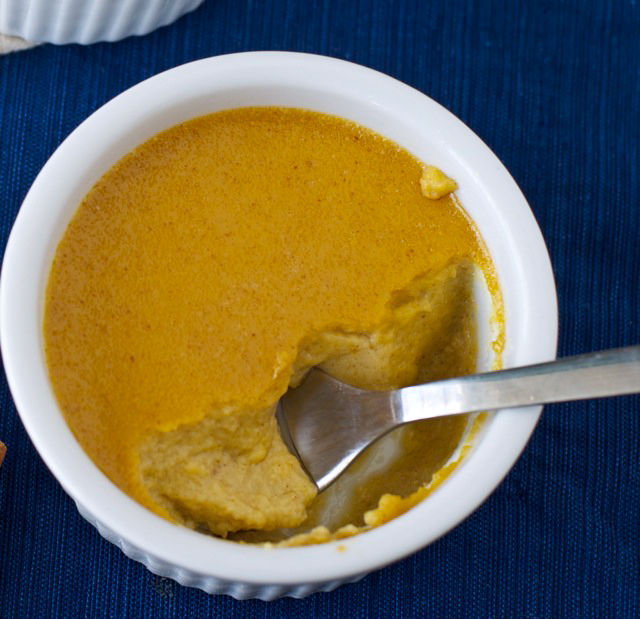
This is also serves as a filling for an awesome pumpkin pie.  But is also great on its own.  We don’t like a real spicy custard or pie, so we backed off on the spices called for in this recipe just a bit, especially the allspice.

½ teaspoon nutmeg

½ teaspoon allspice

½ teaspoon cinnamon

1 tablespoon flour or cornstarch

1 ½ cups mashed cooked squash

½ cup honey

3 eggs, slightly beaten

1 ½ cups milk

Cut the squash in half lengthwise and remove the seeds.  Preheat oven to 325 degrees.  Place the squash face down on a baking pan in put them in the oven.  Add a thin layer of water to the bottom of baking pan to steam cook the squash.  Cook for an hour or until the flesh is very soft.  Let the squash cool and then scoop the flesh out of the skin with a spoon.

Stir spices into flour and mix with squash.  Then add honey, beating till smooth.  Combine eggs and milk, and slowly stir into squash mixture.  Ladle into custard cups.  Set cups in pans of water and bake at 350 degrees F for about one hour.

Makes about three cups.

Jonathan Hull is a permaculture educator, designer, and consultant. After receiving his Permaculture Design Certificate (PDC) in 2006, he co-founded Green Triangle, a Cleveland area network of permaculture educators and designers. Jonathan is a Certified Permaculture Teacher and has been an instructor in several PDC courses and has taught a diverse range of workshops on topics such as soil restoration, bio-char stove construction, site mapping and home weatherization. He currently lives in Salem, OH where for the past ten years he has been implementing a permaculture design for an urban homestead.